Elbow Figure 8
Bandage: Typical Use - Lacerations
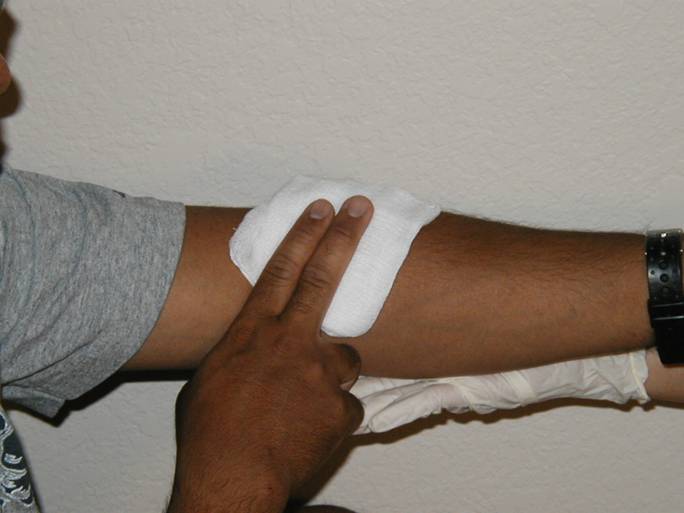
Step 1:
Make sure you’re practicing proper BSI procedures.
Place a
bandage over the wound.

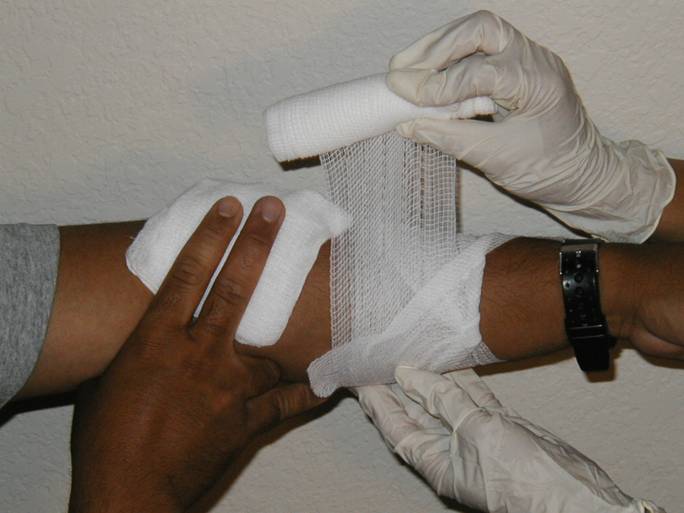
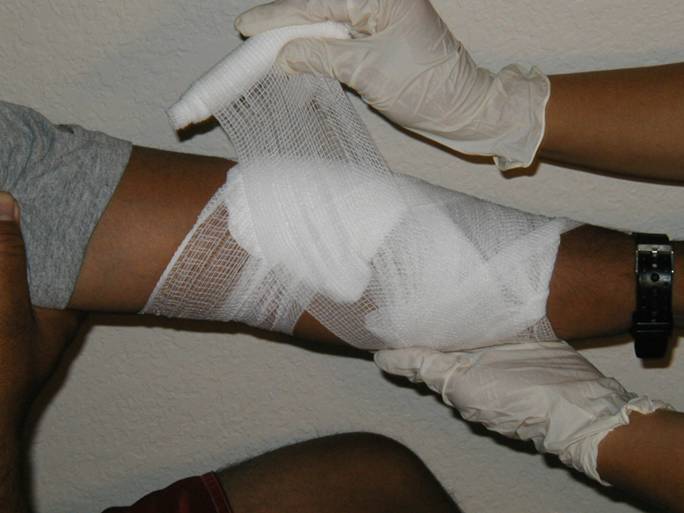
Step 2:
Make a “Tail” on the roller gauze so the bandage
can be
secured and won’t come undone.

Step 3:
Wrap around the “Tail” on the first pass and fold
over the
“Tail” after the first pass.
Step 4:
Wrap over the bent back portion of the “Tail” to
secure
the end of the roller gauze.
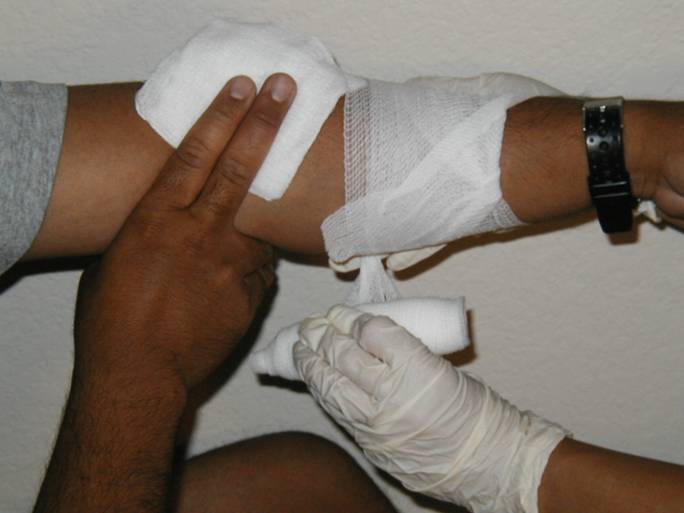
Step 5:
Periodically put “half twists” in the roller gauze to
make the
bandage tighter and snug on the finger. Always
try to
wrap starting distal to proximal to avoid creating a
tourniquet.

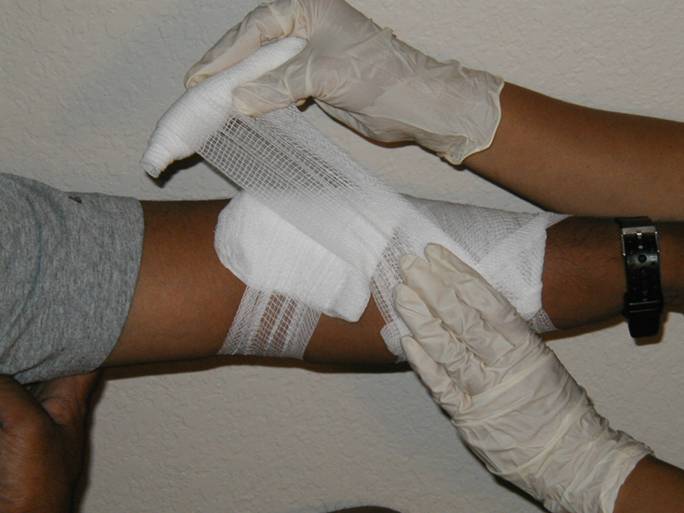
Step 6:
After the gauze is fully secured, make sure the
bandage
is secured and direct pressure is applied by
wrapping over
the dressing.
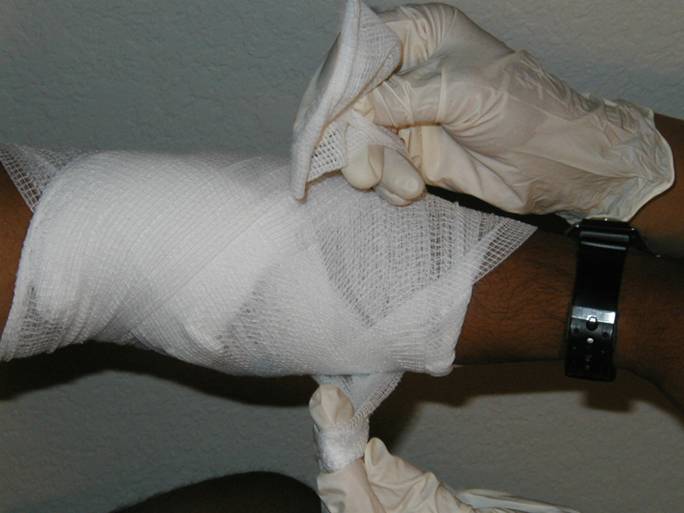
Step 7:
Begin a “figure 8 pattern” wrapping around the arm
in a
figure 8 pass.
Step 8:
Continue the figure 8 wrapping and half twists to
tighten
the bandage.
Step 9:
Release the remainder of the gauze and wrap part
back under the arm in order to tie off the roller gauze.
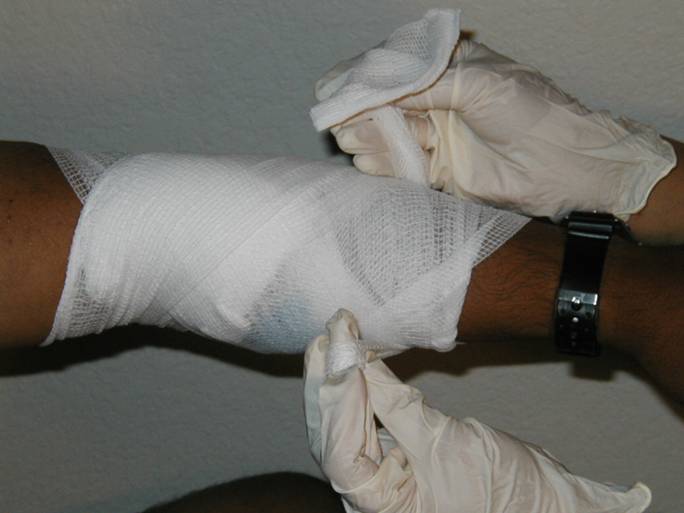
Step 10:
Tie off the roller gauze by opening up the
remainder
of the roller gauze and making a loop under
the arm.
Tie the two ends of the gauze together in a
bow tie.
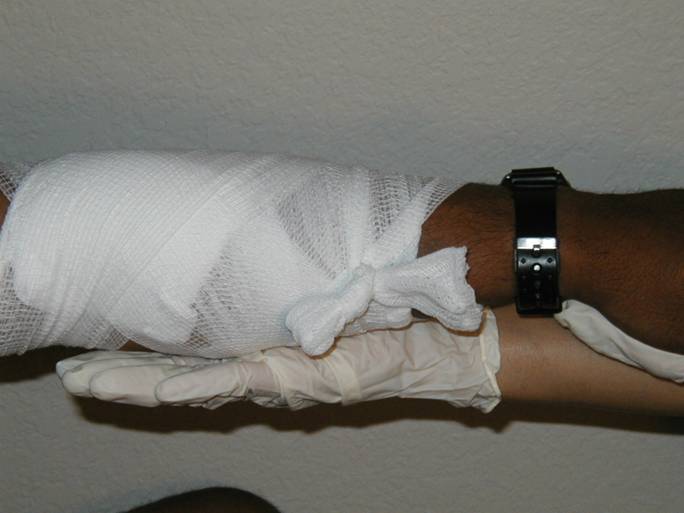
Completed
bandage maintains pressure on the wound and
will not slide off the arm.